Play Now
Important Note:
This guide is for Windows 10 and Windows 11 users. If you use Windows 8.1 or older, visit this page for the Play Now guide for your OS. We do not provide launcher support for Linux and macOS users.
Step 1 - Make a SWG Awakening Account
Register for a game account here. You will need to activate your account by visiting your email and clicking on the activation link before you will be able to log in. Your account will work on both the website and the game server.
Step 2 - Acquiring Sony's Star Wars Galaxies Installation Media
To connect to our server, you will need a copy of the original Star Wars Galaxies client. You must legally own either Star Wars Galaxies: An Empire Divided, Star Wars Galaxies: Starter Kit, Star Wars Galaxies: Total Experience or Star Wars Galaxies: The Complete Online Adventures. No expansion packs are needed to connect to our server(s). Clients obtained through illegal means are strictly forbidden. Copies of the game are still available at most major online marketplaces (e.g. eBay, Amazon).
Step 3 - Installing Star Wars Galaxies
Install the SWG game client onto your computer following the installation wizard instructions (default location is usually Program Files for x86 systems or in Program Files (x86) for x64 systems). You do not need to start the game after install, proceed to the next step.
Step 4 - Ensure Your System is Up to Date
- Install ALL Windows updates/patches (via Windows Update).
- Ensure you have .NET version 4 (how to check)
- Ensure you have the latest version of Direct X (how to check)
Step 5 - Download and Install the SWG Awakening Launcher
You can download the SWG Awakening Launcher installer here (open the link in a new tab if download doesn't occur).
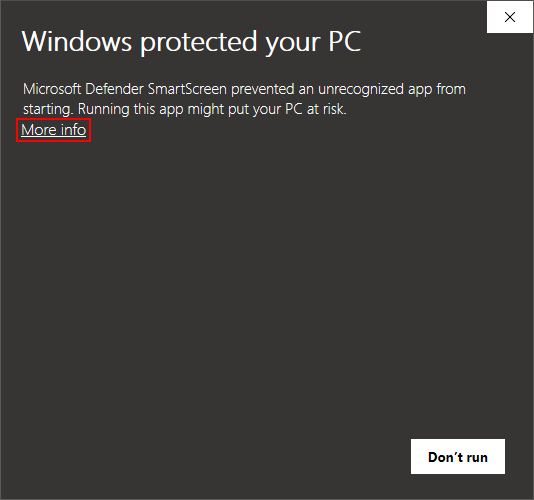
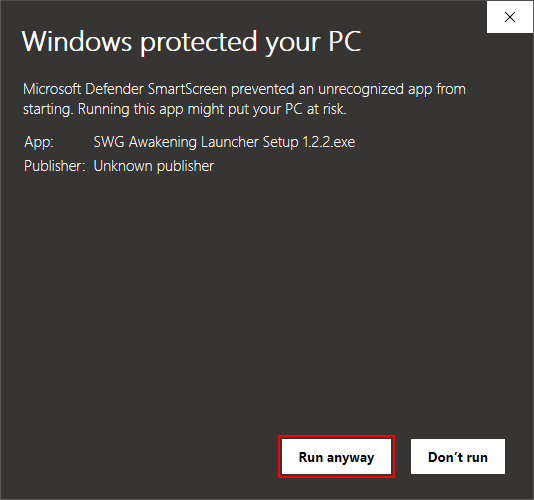
- After downloading, run swg-awakening-launcher-setup-x.x.x.exe. A prompt may appear saying "Windows Protected your PC", this is because we have not got a code signing certificate (the program is completely safe, if you have any concerns the source code is available here). Click "More Info"
- Click on "Run anyway"
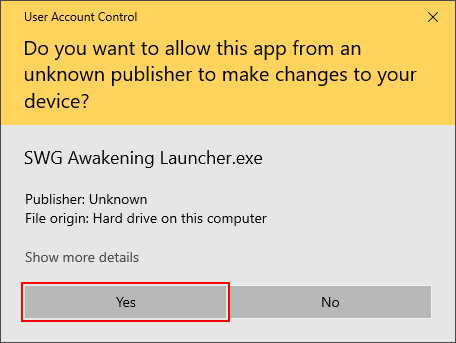
- Now a "User Account Control" prompt may appear, click on "Yes" if it does.
- You will now be shown an installation wizard. Select your LAUNCHER install location (default location recommended). Click "Install". After the install completes, tick "Run SWG Awakening Launcher", then click "Finish".
Step 6 - Running the SWG Awakening Launcher (First Time)
Run the newly installed SWG Awakening Launcher from the desktop or the start menu, if you didn't tick "Run SWG Awakening Launcher" at the end of the last step.
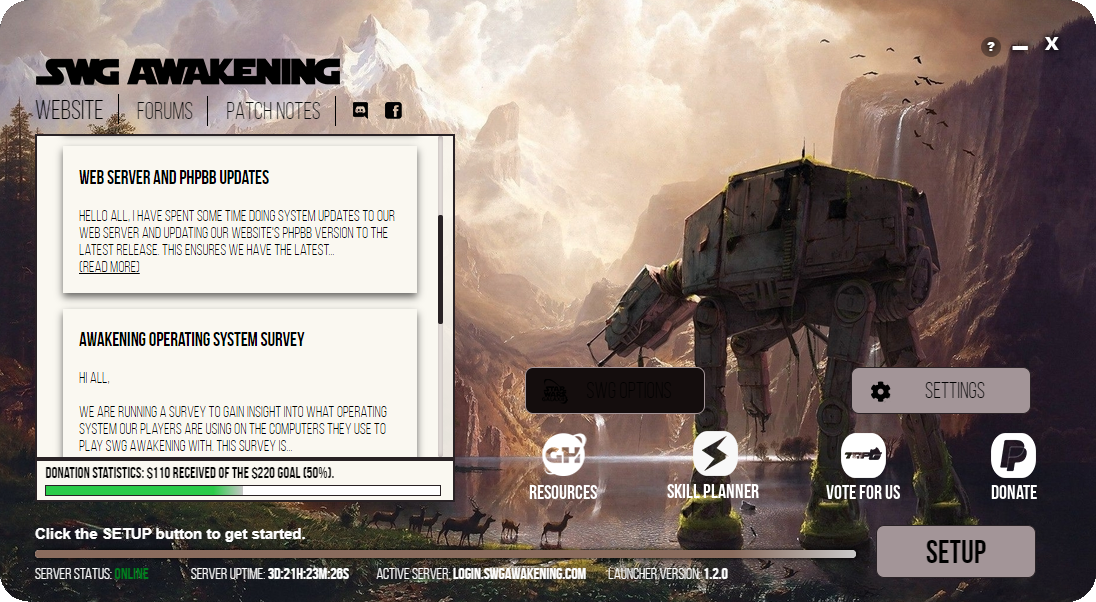
- When the launcher appears, click "SETUP" in the bottom right to perform the first run setup process.
- Read and agree to the server terms of service, then select "NEXT".
- Click “INSTALL FOLDER” and choose a directory to install SWG Awakening GAME FILES to, click “NEXT”.
Note: Do not use "C:/Program Files" or "C:/Program Files (x86)" for your installation. Use C:/SWGAwakening, or a similar directory on any hard drive for best results. - Verify that you own a legal copy of Star Wars Galaxies and select “FINISH”.
Data Relocation - Legacy Awakening Launcher to New
This section will cover how to copy over your data from your legacy SWG Awakening install to the install location of the current launcher's game files. Before following the steps detailed below make sure you have the launcher(s) and all SWG clients closed.
- Open your file explorer.
- Navigate to the install location of the legacy launcher (usually C:\Program Files (x86)\SWGAwakening\). Once there, open the SWGAwakening folder. We will be selecting a number of files to copy over to your new installation.
- In this folder while holding the ctrl button we will be selecting the folder named "profiles", a file named "aliases.txt" and any files with "characterlist_" at the beginning of them. When you have them all selected, right click on the window and select the "Copy" option.
- Now that you have these files successfully copied, you will need to navigate back to the "This PC" page. From there you will need to navigate to your install location for the new set of game files which you selected in Step 6 (default location: C:\SWGAwakening).
- Once there all you will need to do is make sure you are in the main folder for the game files, right click the window and then select the "Paste" option.
- Now, if all steps have been followed successfully you should be able to launch the game from the new launcher and have all of your notes, macros and aliases intact.
Miscellaneous Files - Legacy Install
In addition to those files which affect your game play there may also be other files you wish to keep. These include your screenshots from Awakening and skill planner save data (files with a .swg extension). If you would like to keep these as well, just copy them over using the same steps as above.
Launcher Troubles?
Don't forget to run it in Administrator Mode! Right click on the launcher’s icon on your Desktop and select "Run as Administrator".
Also, check out our Launcher Troubleshooting page it may have the fix you're looking for.
If neither of the above have supplied a fix for your issue open a ticket to get some support.